Comments on building the greenhouse (3m x 6m)
It took me about three full days (one to erect the frame, the second to get the Keder on, and the third to finish the rest). I completed 85% on my own; the remaining 15% needed two people (or, at one point, four). This was in addition to work I had done to get a level site (some of which I had to continue when trying to put the base in, which delayed me a little).
My site slopes somewhat, but I managed to get a reasonably level frame in the end by cutting slightly into the slope at the nearer end. Once I had done this, the frame went up easily.
It proved very difficult to fit the Keder over one of the spans with an automatic vent. (It popped out of its supporting channel at one point, and then seemed unevenly distributed. I am not sure why this happened because the second such span covered as easily as the first had been difficult. Though in the end, everything seemed to work out alright.
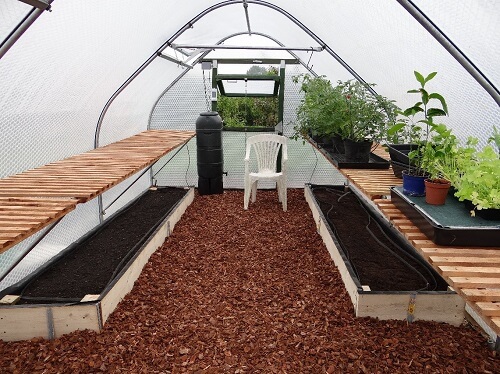
I then installed a couple of raised beds within the greenhouse, and am attempting to install some solar-powered watering (though this is not working out too well at present).
Specific comments on the instructions
Para 5.1 Offsetting the rods at 22o – which way? Care needs to be taken to keep the frame horizontal – it proved easy to pull the frame slightly out of alignment, which may have given some of the problems with getting the Keder on.
Para 10.1 Point out that the two sided nuts / bolts (item 32) are attached to the L-shaped plates, not separate. I was looking for them for some time.
Para 20.6 Cutting the rear vent – I think I can improve on the instructions here. Above the horizontal line of the two rods, cut as near to the battens on the vent itself; below the line of the two rods, cut as near to the battens on the frame; cut between the two on the line of the rods. This allows the vent to swing open effectively, but maintains a draught strip all the way round.
Para 21.3 When the instructions say that an L-shaped plate is to be fitted to the roof vent to stop it dropping down, the plate is in the box with the roof vent, not with the other L-shaped plates. (The significance of this is that the L-shaped plate for the automatic roof vent has two holes drilled in it, whereas the others only have one.)
Para 26.2 Fixing the slats. Not clear how this goes, but the video suggests that the L-shaped plate is attached to the steelwork. I attached it to the rear of the slats themselves (i.e. to the wood, using two fixing brackets at the rear), so that I could easily remove the slats if I can a tall plant to grow, but they would not slip off when in place. This seems to work.
My three construction days were very warm, but generally very still. I do not think I would have been able to do so much on my own if the weather had been windier.
Summary
I am delighted with the result – both in the finished product, and in the satisfaction of putting it together. (I spend a lot of my time at a desk, so doing something physical for a change was very satisfying.)
If anyone in the Canterbury area is thinking of buying a Keder Greenhouse, I would be happy to show them round mine.